
VCAP-DTA – Objective 5.3 – Compile and Deliver Full or Streaming Applications
So now the prep work has been done to get Active Directory ready for ThinApps, the next thing to do is to actually roll some! The recommendation is to have a clean vanilla install of the platform you want to virtualise on (so a clean Windows 7 machine for an app to be deployed to Windows 7). I’ve heard people say to virtualise on XP and then you can have an app on the lowest common denominator, but for the exam that’s a level of detail we’re not concerned with.
- Build and modify a ThinApp project – The first task is to roll an application using the ThinApp packager by running the Setup Capture wizard either remotely or from a locally installed copy. This is a five step process which basically involves Prescan, Installation, Postscan, Configure and Build. It’s all wizard driven as per below :-

In the interests of time in the exam, I’m guessing you’ll be asked to package something reasonably cheesy and small, such as 7-Zip. Run the pre-scan task to get a “before” configuration snapshot. This doesn’t usually take longer than a couple of minutes. Once it’s done, you’ll be asked to run the installer, do this now. Always worth making sure you run the installer as an Administrator, that can sometimes cause odd things to happen to applications (and may well turn up in the exam). Once the install has completed, hit the postscan button to perform the “after” snapshot of the local filesystem and registry. You may get a warning to ensure the application has completely installed, so just double check this before you continue.

Once the post scan is complete, you’ll be asked to choose an entry point. This is basically the application executable. The wizard is usually pretty good at getting this right, but double check anyway. If you install a suite of products (say Office), you’ll need to add an entry point for each application such as Word, Excel, etc.
The next step chooses whether or not to manage the application via Horizon or if you’re updating an existing package. Choose as appropriate. The next step is to select which AD groups (if any) have access to the application. My guess is in the exam, you’ll be asked to restrict this app to a particular group and then test it.

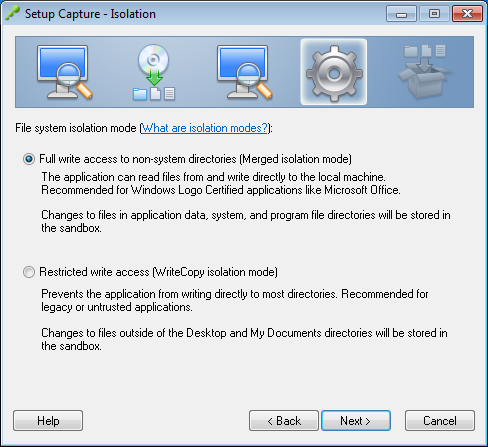
Next step is the application isolation mode. This is the kind of thing vendors love to test on exams. The default is merged isolation mode and allows the application access to read and write outside of the ThinApp sandbox. If I could dream up a test scenario for this, it would be that a virtualised app is playing up because it’s in WriteCopy isolation mode. This mode intercepts writes and stores them in the sandbox. The use case for this is a highly locked down environment where you don’t want users writing to the local filesystem into system folders etc. The dialog is shown below:-
The next choice is the sandbox location. This is typically left as the default of the user’s profile. This basically allows the user to roam and still have access to the application sandbox. There may be cases where a USB stick is appropriate, and it may be there is a scenario on the exam where you need to alter this from USB to Profile to fix a fault.

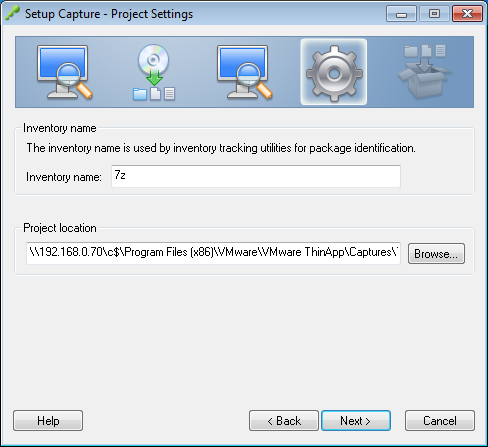
Click Next and you’ll be asked if you want to send feedback to VMware. I highly doubt your exam score will have any bearing on what you choose here, but just in case it’s specified in the scenario… Then give the application an inventory name (AKA folder name in the Captures directory) and a path to store project files. If you’re running the Setup Capture from a network share, chances are this will be pre-filled for you, as below:-
Select the primary data container (which is the application you wish to run) and whether or not you want to build the ThinApp as an MSI and whether or not to add compression, as per below. Click Save when you’re done:-

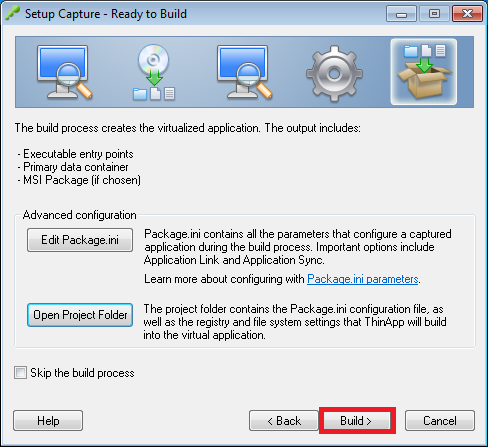
You’re now at the final step before the build process kicks off. You still have the opportunity at this stage to edit the package.ini file with any last minute adjustments you need before you start. There is still time at this stage too to go back in the wizard if you forgot to check the MSI build option in the previous screen. If all is well at this point, hit the Build button as shown below:-
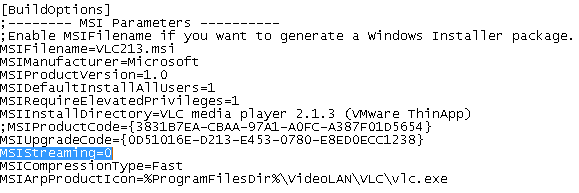
- Configure MSI Streaming – This is a pretty easy task. Once you have a built ThinApp, open the package.ini file in the directory and open with Notepad or some other text editor. Find the section entitled [BuildOptions] (hint – it should be near the top!) and find the line that says MSIStreaming=0. Change this to MSIStreaming=1 and most important of all, don’t forget to rebuild the ThinApp with the new setting! To do this, run the build.bat file in the ThinApp package directory (i.e. the one with your ThinApped application files in). When the rebuild completes, copy the bin folder contents over to your ThinApp repo you previously defined.
You will also then need to add the application into the ThinApp dialog in View Administrator. Go to Inventory | ThinApps | Scan New ThinApps.. | Select the ThinApp repo | Select the folder to scan for new ThinApp(s) | Next | Select any detected applications you want to add | Click Scan | Click Finish.
- Deploy ThinApp applications to desktop pools – Once you have one or more ThinApps created and then added to View Administrator, you need to configure usage. In the case of desktop pools, this is easy to do. From View Administrator, choose Inventory | ThinApps | Pick your ThinApp from the list | click on the Add Assignment spin button | select Assign Pools | select the required pool(s) in the dialog and click Add | if the ThinApp has been set for streaming, choose the Installation Type radio button for either Streaming or Full.
- Configure ThinApp entitlement using View Administrator – To be honest, I don’t understand this objective. You can assign ThinApps by pool or by specific desktop, and that is the limit of what View Administrator can do. It may be that this objective is dealing with desktop specific assignment, if so, simply repeat the steps above but choose individual desktops instead of pools.
