
Upgrading The Home Lab Part III : Upgrading VMware Tools and Virtual Hardware
We’ve arrived at the final part of our odyssey (a small odyssey in my case, but an odyssey none the less!) in our upgrade to vSphere 6.0. We’ve upgraded vCenter (relatively trouble free), ESXi (not so much, but that was down to my Jurassic era hardware) and now we have the small matter of the VMs left, to upgrade VMware Tools and virtual hardware to the latest versions.
This might seem like the easiest task of the lot, but actually in my experience this is the hardest part. Not so much from a technical level, but from the perspective of there being large numbers of VMs to touch, and of course in times of Change Management, getting agreement to down VMs to upgrade their virtual hardware can sometimes feel like rutting stags in a field. Although from vSphere 5.1 onwards, a Windows reboot for an upgrade of VMware Tools was eliminated, we still need to power off VMs in order to upgrade their virtual hardware.
 “Barry, let me upgrade the virtual hardware on your Exchange Server!..” “…No! Bugger off, Maurice! I can’t have 5 minutes downtime!..”
Thankfully, VUM can come to our rescue again. When it’s installed, it creates some default patch baselines. Two of which include baselines for upgrading virtual hardware and VMware Tools. You can see these by clicking on the VMware Update Manager button in the Home view in the vSphere Client. You need to click on the “Baselines and Groups” tab and then on the “VMs/VAs” button. You should see the following in your VUM screen:-

There is also an upgrade path for virtual appliances you can see at the bottom, we’re not going to cover that here as usually appliances are in the minority. VMs are what we’re looking at here. In order get VUM to bring our VMs up to date, we need to create a couple of Baseline Groups, or we can just use a single group if we want to consolidate both upgrades into a single operation, which is what I’ll be doing. We can do this from the same screen as above, in the right hand pane. Click on the “Create” button to start the Baseline Group as shown below:-

This starts the Baseline Group creation wizard, which only really has a couple of steps to set up, nothing too tricky. Give the Baseline Group a name, as below. And no, don’t use one of the Bee Gees like I did with the stag picture:-

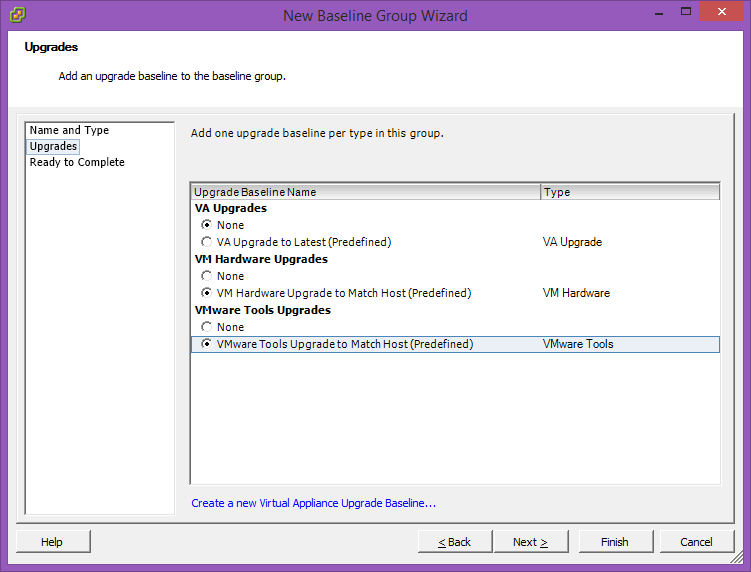
Click Next and as we’re only upgrading VMware Tools and virtual hardware, we’re going to leave virtual appliances alone. We are going to create VM upgrades, so tick the radio buttons next to the following groups:-
- VM Hardware Upgrade to match host (predefined)
- VMware Tools Upgrade to match host (predefined)
This is shown below:-
Click Next..review the settings and click Finish and you’ll see the following screen:-

So now we have our baseline groups created, we now need some VMs to attach them to. As I’ve said countless times before, this is a test environment, so I don’t suffer from the same constraints as a production system. That’s another way of saying “if something explodes, I don’t care”, but that being said, I do want to stage these updates to make sure everything works as I expect before I push the baseline group to a wider audience.
I am not going to update any virtual appliances as I mentioned previously, and I have no VMs right now that are Linux based. Rather than pushing out the baseline to all Windows VMs, I’m going to stage them by folder. First up is my seldom used Windows Cluster folder. This has two Windows Server 2012 R2 nodes and an iSCSI target also running Windows 2012 R2. As I hardly use this cluster, it spends most of it’s life powered off, meaning it’s a good place to test my rolling VM updates.
So to start with, if you haven’t already, create a folder and move the VMs you want to update into this folder (hint: you’ll need to be in the “VMs and Templates” view in vSphere Client to do this). Once you’ve done this, you can add the baseline group to the folder by clicking the Update Manager tab and clicking the Attach.. button. You’ll then see the dialog below:-

As you can see, I already ticked the box to add the Baseline Group to the folder. The sharper eyed readers amongst others will notice I could have done this without creating a baseline group first, but I think my way is neater 😉
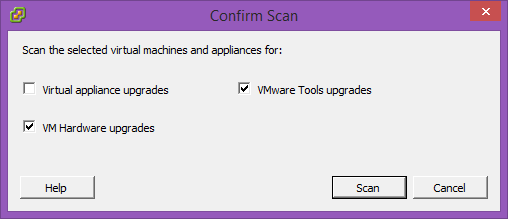
Click Attach and then you will need to perform a Scan.. just as we did with the hosts. In fact, it’s exactly the same process. Remember at this stage, we don’t care about virtual appliance updates, so make sure you untick that box and tick the other boxes for VMware Tools and virtual hardware, as below:-
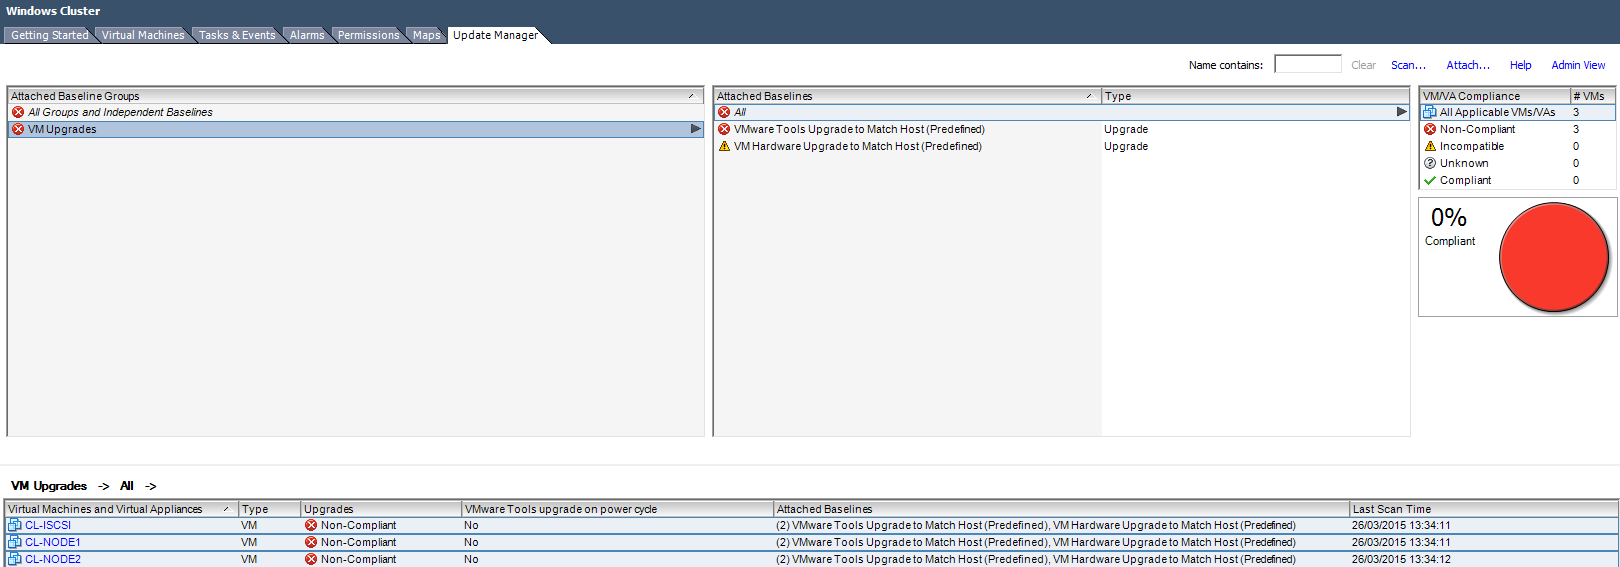
The scan results are in, and lo and behold I’m not compliant:-
In which case, I need to hit the Remediate.. button to apply both sets of upgrades, just like we did with the hosts. This starts an upgrade wizard, as shown below:-

On clicking Next.. the next step is to schedule when we want the upgrades to occur. Like I said, these boxes are my guinea pigs as they are hardly ever powered on, so I can go ahead and do it immediately. In the production world, you’d probably have to do this out of hours or whenever your maintenance windows are:-

Give the task a name and description as shown above, and decide when you want the process to run. The scheduled intervals are applied via powered on machines, powered off machines and suspended virtual machines. By default, Immediately is set for all cases. Take care here!
One really useful feature of using VUM to upgrade VMs is the ability to create snapshots ahead of the actual upgrade processes. This is very handy on the off chance that something goes badly pear shaped. There’s no reason it should, but it’s always nice to have a safety net, isn’t it? And you are creating full offline backups, aren’t you?
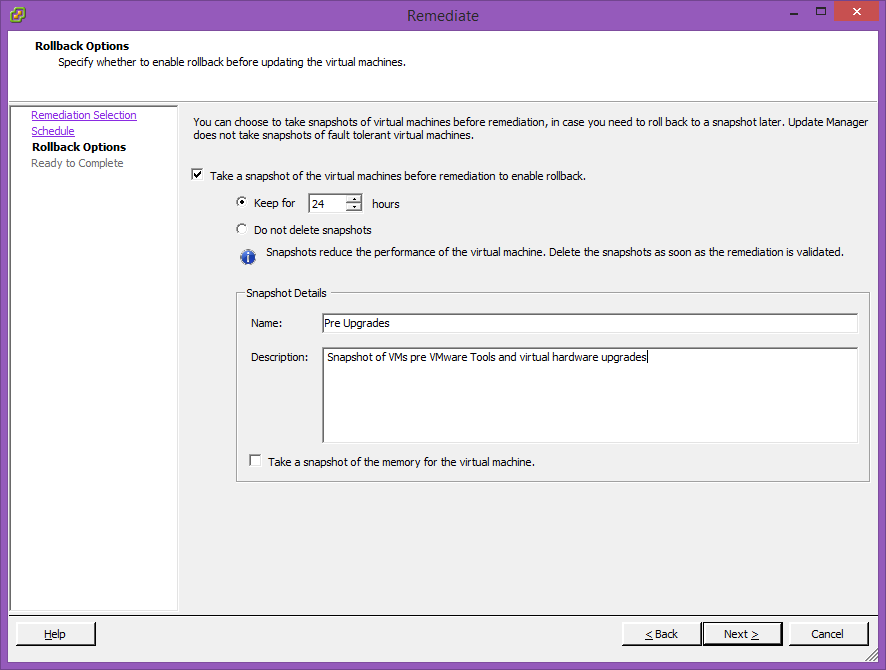
So as you can see above, I’m keeping the snapshot for 24 hours (default is 18, for some reason). You can keep them forever if you like, but if there are a lot of VMs to be upgraded, this could swallow a lot of expensive storage in a busy environment very quickly. I just want to make sure the VM boots and reports back in as up to date once the process is complete. 24 hours is plenty of time for me to validate the update hasn’t eaten my VM. As these particular VMs are already powered off, no need for me to select Take a snapshot of the memory for the virtual machine. This requires a running instance of VMware Tools and can add a lot of time to the process, so use sparingly.
Time for one last sanity check and then hit Finish if you’re happy:-

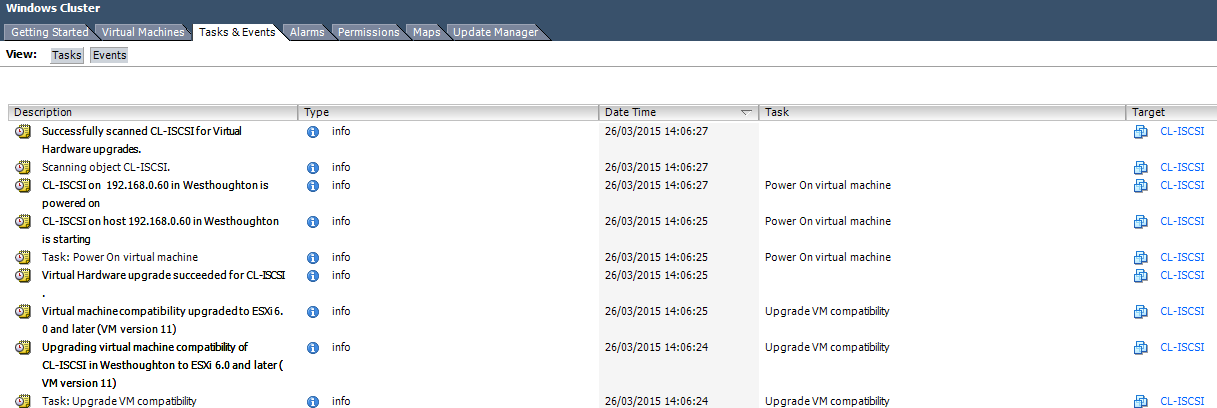
You can then monitor the upgrade task in the tasks pane at the bottom of the screen, as below (click to expand):-

Once the upgrade task completes (and this could take a while, so go and make a coffee or something), you should see a fully compliant bunch of VMs. If you don’t, you can use the Tasks/Events window (Events mainly) to help troubleshoot what went wrong. The law of averages says that a couple of VMs out of dozens will need some minor hand holding. To get through them all without issues is pretty much unheard of, so don’t worry. As you can see below from the Events window, the upgrade process is ongoing:-
And then after a little while of VUM whirring away in the background, skidoosh! We have 100% compliance!

Don’t believe me? Here’s what one of the VMs says..

We’re on version 11 virtual hardware (ESXi 6.0 compatible) and VMware Tools are current. All done by VUM in the background. Multiply that by a few dozen VMs and you’ve got a nice time saver there! I also wanted to show that the pre-upgrade snapshot is available for us, on the off chance something went septic:-
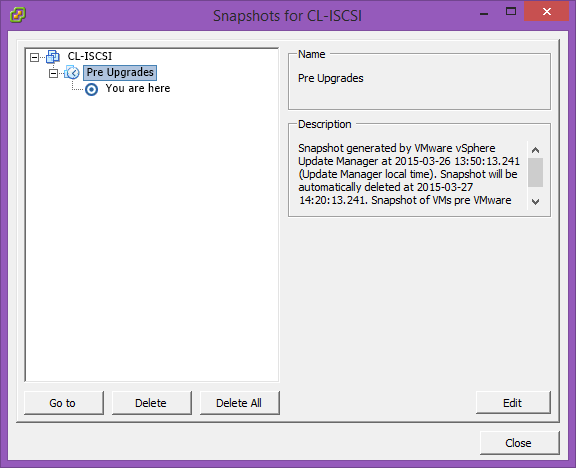
As you can see, VUM even puts in a useful description so we know what the snapshot is, when it was created and when it will be deleted (if applicable).
Conclusion
Upgrading VMs can often be the trickiest part of the upgrade process as there can be hundreds or thousands of objects to be updated. However, VUM can make this process pretty painless by automating the upgrades and scheduling them for a time that suits you. Don’t be like Barry and Maurice at the top of the article – get a maintenance window with the VM owner and get VUM to do all of the heavy lifting for you.
