
Upgrading the home lab Part II : ESXi hosts
In Part I of the “Upgrading the home lab” series, we migrated/upgraded the vCenter appliance from version 5.5 to 6.0. That all seemed to go pretty well, so the next major step on the road to vSphere 6.0 is to upgrade the ESXi hosts in the environment to ESXi 6.0. Just before we get to that, we’ve actually missed a step out. Once vCenter has been upgraded to version 6.0, you should take a few minutes to upgrade VMware Update Manager (VUM) to version 6.0 too. In my case I hadn’t got around to building a 5.5 VUM server, so I just built one out from scratch with the vSphere 6.0 installer DVD. I just did a simple install and used the SQL Server 2012 Express version for the database, as I’m just managing a single host. For 5 or more hosts, you should go and get the “full fat” SQL Server.
What’s new with VUM?
Not really a lot as far as I can see. It still requires a Windows Server (minimum 2008, but 2012 R2 should be your aim these days), still requires a SQL database (see above) and still requires the vSphere Client (not the Web Client) to perform any kind of meaningful management. In that respect, it doesn’t look much different than it did in 5.5 days. You can read what’s new in the VUM 6.0 documentation, but it seems to be more database support than anything to get excited about (like baking it into the appliance, for example).
Upgrading the ESXi host(s)
To upgrade your hosts, there are a couple of different ways you can do it. You can boot from the DVD (or remotely attach an ISO image if you have an iLO/DRAC card etc.) and perform an in-place upgrade, you can use VUM to upgrade your hosts, or you can boot from DVD/ISO and perform a fresh installation. It depends what you want to achieve in the process, obviously you want a quick and supported way of getting your hosts up to date, and VUM is VMware’s recommended method.
However, in most enterprise environments, ESXi hosts are commodity items – by this I mean all VM data (and even ISOs) are stored on shared datastores on SAN/NAS etc. In this case, you can achieve a “clean slate” installation by using the installation DVD to perform a fresh installation with the original addressing information. Consider the use of host profiles to “backup” the host configuration before you start (requires Enterprise Plus licencing).
You can also use scripted upgrades, using Auto Deploy or the esxcli command, see here for further information on supported methods. I’m lazy, so I’m using VUM.
Using VUM to upgrade your hosts
As noted above, VUM is the recommended method of upgrading hosts to the latest version of ESXi. In terms of supported prior versions of ESXi, if you’re version 5.x or above, you’re pretty much in clover. Anything older than that is basically a fresh new installation. That’s not all bad, depending of course on how many hosts you have to get through. Remember to check the VMware HCL to ensure your host hardware is supported with ESXi 6.0 and if you can, obtain the custom vendor ISO for ESXi for the best level of driver support and functionality. At the time of writing however, I was only able to find the HP version of the custom ISO (as you can see below), so I will have to use the GA ISO to upgrade my PowerEdge. Hurry up, Dell!

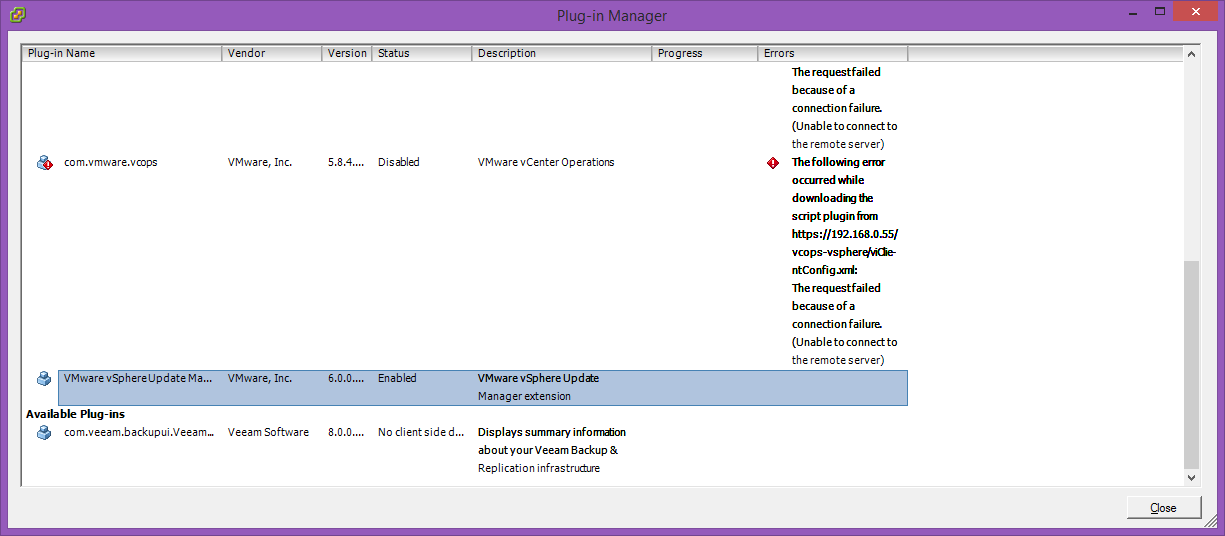
Once you have obtained the ESXi 6.0 ISO, ensure your VUM plugin in the vSphere Client is installed and enabled (and one step I haven’t specifically called out is to ensure you upgrade your vSphere Client to version 6.0 before you start this part. Reports of it’s demise have been somewhat premature!). You can check this by going to the Plugins menu and selecting Manage Plugins.., you should see something similar to the following:-
If you have a prior version of the VUM plugin installed or you don’t have the plugin installed, you will have to select the “Download and install” option. This runs a brief installer and does not require a reboot nor a restart of the vSphere Client. If the installation has been successful, you’ll see the plugin enabled in the Plugin Manager and you’ll also have a button on the home screen and an extra tab on the host view.
The next step is to upload our ESXi ISO into the VUM repository and create a patch baseline. To do this, you need to go to the Home view in the vSphere Client and then click on the VUM button in the Solutions and Applications section, as shown below:-

This button takes you into the VUM management view and from here we need the ESXi Images tab, as shown below:-

And then from there, click on “Import ESXi Image” as shown above. Browse to and select the ESXi 6.0 ISO you downloaded, click next to start the import process and you should see the following progress dialog. This only usually takes a couple of minutes or so.

If the import has been successful, you’ll see the following dialog:-

We now need to create an upgrade patch baseline from this ISO so we can add it to our hosts to be upgraded. Leave the “create a baseline” option ticked and give it a meaningful name, as shown below:-
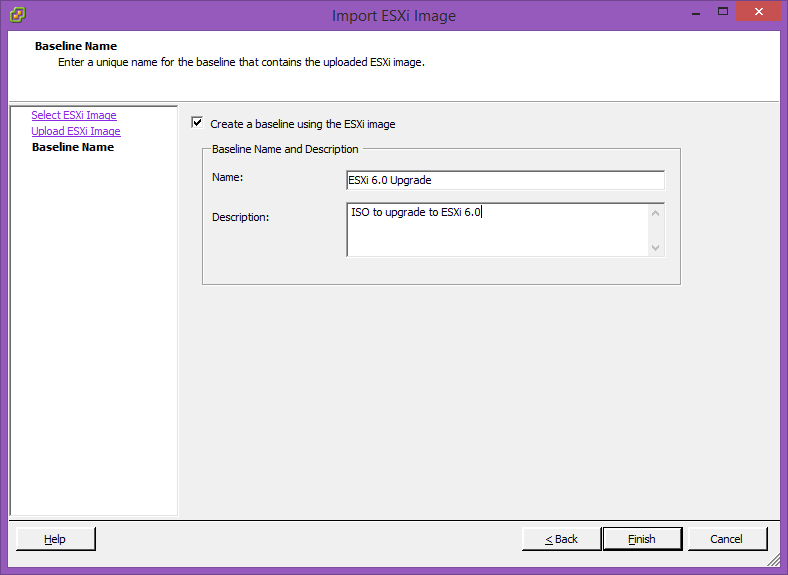
And click “Finish”. All being well, you should now have both the ISO imported and the baseline created, as shown below:-

So now we have imported our ISO and we have created a baseline. Now we need to associate this baseline with an object to be upgraded. We basically have three choices here – we can apply the baseline at datacenter level, cluster level or we can apply the baseline at individual host level. I’m going to go for the first option, just so I can call out some differences between the options. To apply the baseline to the datacenter object, select the datacenter object in the vSphere Client, select the Update Manager tab and click the Attach.. button on the far right, as shown below:-

As you can see, my datacenter has no baselines already attached. In the “Attach baseline or Group” dialog, you should see the upgrade baseline we created earlier. Tick the box and tick “Attach” as shown below:-

Once you have attached the patch baseline to the datacenter object, the view in Update Manager should change. You will see the hosts added and a 0% compliance report. This is because we haven’t yet run a scan against the host to check what version of ESXi already exists and if the host is compatible with the ESXi 6.0 upgrade. Next, select your hosts and click the “Scan..” button in the top right.

In our case we just want to scan against upgrade baselines, so be sure to tick this box in the “Confirm Scan” dialog:-

Click the “Scan” button and VUM will go off and query each host in turn for their compliance against the ESXi 6.0 upgrade baseline we created. This should only take a couple of minutes per host. Once the scan is complete, you should see new information in the VUM tab. In my case, my host as come back as “Incompatible”, which doesn’t surprise me in the least as this host hardware is prehistoric by any measure. However, I can still force the upgrade to run if I know the installer will complete successfully. This isn’t strictly supported by VMware, but all this basically means is that only current generations of servers are tested by VMware and their partners for HCL purposes. To recertify every piece of server hardware for each new release of ESXi does not make sense. This does not however mean that your server can’t run ESXi 6.0, I suggest you test it on some development kit first before moving forward. In my lab, I don’t care!

As you can see in the above graphic, my host is older than Bruce Forsyth and as such comes back as non compliant in VUM. No surprises there. In order to force this upgrade through, I can hit the “Remediate” button to force the upgrade to start. I have seen in the field some HCL certified kit come back as incomplete, so sometimes you do need to know how to do this to get the upgrade done. This in turn starts a 6 step wizard to push the upgrade down to the host via VUM. First up, we need to select which hosts and which baseline to use, as below:-

Then we thoroughly read and agree to the software EULA:-

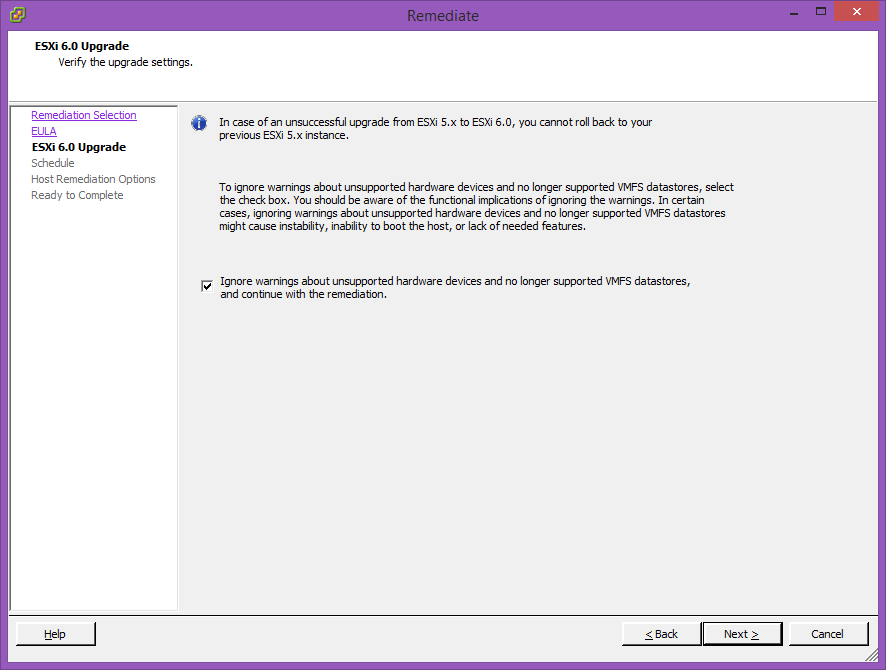
The next step is “signing the death warrant”. If this goes toes up, that’s down to you! Check the box to ignore warnings and in my case, hope my offline backups are good!
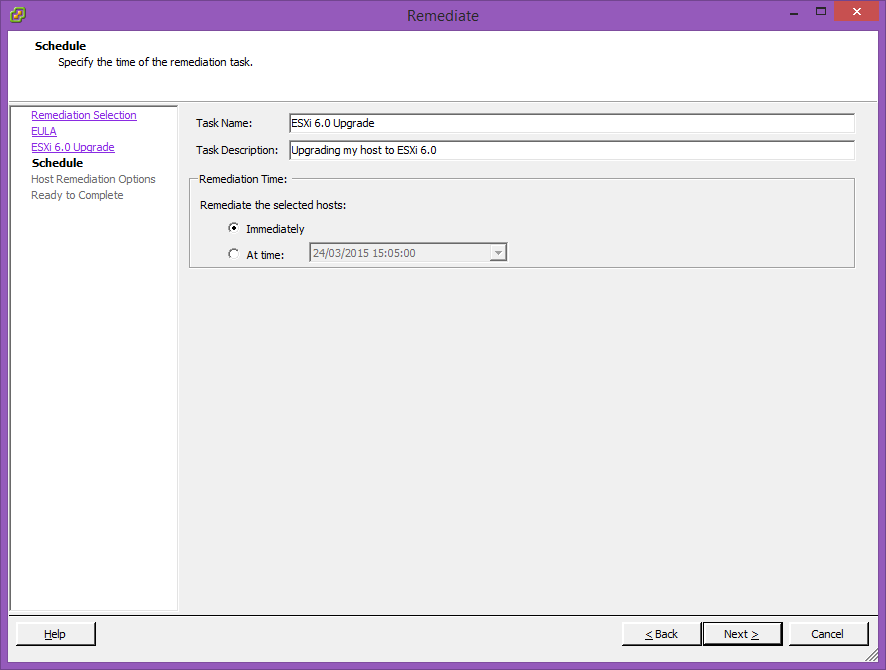
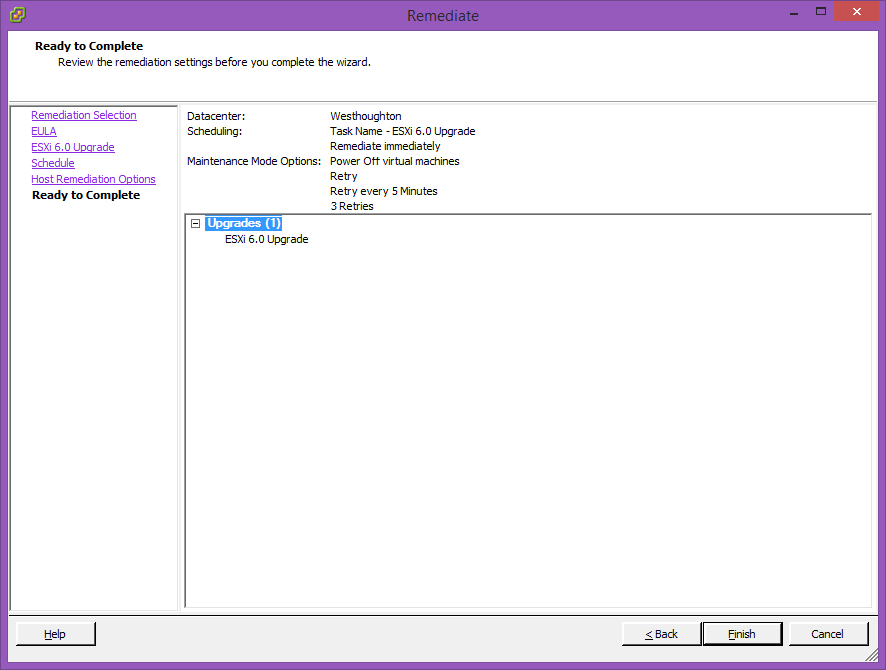
Then we give the task a name and description (you can call it anything you like, really) and schedule when this upgrade should be done. I’m going to do it immediately, because I just can’t wait for ESXi 6.0 goodness!
In the final configuration step, I need to tell VUM what to do if there are running VMs on the host to be upgraded. Normally you wouldn’t change anything here as really you should already have your host in maintenance mode before you target it with the upgrade. As my vCenter appliance is on the host to be upgraded, I need to be slightly more creative and get vCenter to power VMs off.

Then one last sanity check before we hit the chicken switch…
And off we went. However, big problems lay ahead. VUM spat out my upgrade saying the CPU in my host was not compatible. OK, fair enough. I did buy it from Fred Flintstone! What I did instead was to burn the ESXi 6.0 ISO to CD and boot it off the physical DVD drive in the host. This way I can basically tell the installer I don’t care about compatibility and support issues, I’m going to bear the risk of it all turning to toast.
First off, I booted from the CD and as the files were copying (black screen with yellow thin progress bar at the top), I got the error “Error loading /s.v00 Fatal error: 6 (Buffer too small)” and the whole thing just stopped. I didn’t get it – the MD5 matched the VMware download site! I downloaded the ISO again, but this time I performed a “direct” download rather than using the Download Manager. The MD5 matched again, I burned a new CD and this time it all worked just fine.
Even though the installer complained bitterly about the host CPU, CPU virtualisation modes and a PCI device not being supported, it all seems to work just fine. The host booted and my vCenter appliance auto started as usual. For completeness, time to go back into VUM and validate my upgrade. To do this, select the host, go to the Update Manager tab and select “Scan” again, as previously. This should take just a minute or so, and then we get what we were hoping for. Green!

So now we have vCenter at 6.0 and ESXi at 6.0. Not without a few niggles, but that’s just a consequence of using such old hardware. The moral of the story for me is that it’s high time I gave my boxen an overhaul. Finally, as a last piece of housekeeping, I’m going to validate the status of my vSphere Client plug-ins :-

It seems everyone is happy except Mr Auto Deploy. I don’t use Auto Deploy in my lab, but red errors kind of piss me off anyway. I performed a quick Google and found a blog post by Kyle Gleed that tells you how to fix this. You simply start the Auto Deploy service on the appliance as it’s disabled by default. God bless the internet. However, Kyle’s instructions reference a management interface to the appliance which is no longer used in 6.0. In order to configure appliance based services, you must login to the Web Client as an administrator and enable it from there.
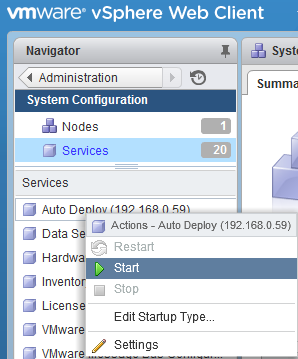
In the main Web Client home screen, click on the “Administration” button on the left and navigate down to Deployment/System Configuration as shown below:-

Then click “Services”..

And then right click on “Auto Deploy”.. and select “Edit Startup Type”..

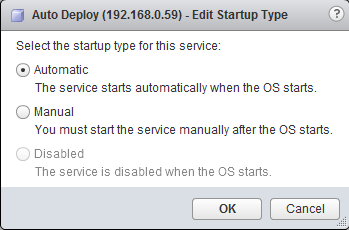
Select the Startup Type, depending on how you want the service to start on appliance boot – I’m choosing “Automatic“and click OK..
And then manually start the service by right clicking again on “Auto Deploy” and selecting “Start”..
I then go back into Plugin Manager, enable the Auto Deploy plugin (accepting any certificate warnings) and we should be free of errors!

As a side effect, we also have a nice button added to the home screen:-

Conclusion
So there we go, we now have an upgraded vCenter Server and ESXi host. I wouldn’t advise forcing the upgrade through the way I did unless you have nothing to lose – i.e. it’s a test lab or something non production. If the host hardware you are installing to is HCL listed, you should whizz through a VUM focused upgrade just fine.
If you get any odd errors in the Web Client, try deleting your browser cache and also the Flash Player cache from Control Panel. There could be something caught up in there from 5.x days.
Next stop is upgrades to the virtual machines – virtual hardware and VMware Tools. That is to come in Part III !
